Facebook


We've moved to Facebook! Follow us there!
Showing posts with label Sewing. Show all posts

Monday, July 19, 2010

New Wraps for Lines and Shore Cord

Have you ever thought, I need something to keep "X" from coming uncoiled? On our Gemini 3200, the "X" is numerous.

I've been thinking for some time on how to keep things from coming uncoiled that would not cost a lot, if any, money.

The idea of the wrap came from a marine chandlery that we call "Tiffany's," because of their prices. I was browsing through their catalog when I came across wraps priced from $1.99 to $6.49, depending on material. The wrap looked so simple, I decided to make them.

Using webbing, velcro, and Beulah, I made two wraps in less than 5 minutes for less than $.25 each. The wraps are a piece of 12" long webbing with 2" of velcro. Just sew the loop part of the velcro on one side of the webbing, at the end, and the hook part of the velcro on the other side, at the opposite end. That's it. (Note: Make sure to sear the ends of the webbing or cut it using a hot knife, because it likes to ravel.)

Friday, July 16, 2010

Cockpit Cushion Covers

N0w that the settee cushions on our Gemini 3200 have been refreshed, I wanted to do something to brighten up our boat cockpit without spending more than $50. The solution was to make covers for our existing cockpit cushions.

The existing cockpit cushions are closed cell foam covered in a designer phifertex fabric. The cushions are fantastic, because neither the phifertex nor the close cell foam absorb water. So they not only serve as seat cushions, but also could be used as flotation aids. The cushions would be perfect, except they look drab and the phifertex fabric is not comfortable.

After exploring different options, I happen upon a project posted to Sailrite's facebook page were someone used beach towels to recover their cockpit cushions. The great thing about using beach towels is that the towels could be used for multiple purposes and they wouldn't take up valuable storage space.

I started my search for the right beach towels. I was fortunate to find towels that matched the interior color palette at Target for $9.99. I purchased 4 towels.

To make the cover, I wrapped an existing cushion in a towel and pinned it in place. Then I pinned velcro to the towel and sewed it into place using my LSZ-1 Ultrafeed sewing machine.

The cover installation takes only a minute. Just place a cushion on a towel and wrap it in the towel like a present. The velcro functions as the tape.

I love the new look and can't wait to try them out the next time we are in Savannah.

Thursday, July 15, 2010

Settee Cushions Redo - Materials and Cost

Recently, I completely remade the settee cushions for our Gemini 3200. I did not go into details about how to make the cushions, because Sailrite's dvd gives all of the detail and they are the experts. I do want to share with y'all the list of materials and cost. Maybe this information can help someone looking at redoing their settee or other large upholstery project.

Our Gemini 3200 has six large cushions (3 back and 3 seat cushions) that make-up the settee. The back cushions are basically rectangles and two of the cushions are mounted on plywood with a teak back plate, so no need to cover the back of the cushions with material. The three seat cushions were irregular in shape and a little more challenging.

All-in-all, this project took 65 hours for me, to complete. (This was my first big sewing project and the first time I had ever installed zippers. The Sailrite dvd was the only reference I used and it was the only one that I needed.) I think that now that I have some experience, this project would take less time for me to complete.

All of the materials for this project were purchased from Sailrite, except the foam which was purchased from my local Joann's. Note: I was able to use coupons/sale discounts to purchase all of the materials.

The list and quantity of material below was sufficient to make 2 back cushions - 65"x14"x2", 1 back cushion - 74"x14"x3", 2 seat cushions - 62"x20"x4", and 1 seat cushion 69"x24"x4".

Materials from Sailrite:
12 yards of Naugahyde Universal Pure White 54" - $155.40
180 yards Deluxe Vinyl Emossed Welting/Piping Pure White - $ 99.00
1 1oz Spool plus 25yards of V92 White Thread -~$ 5.00
2 #10 White 72" Zippers - Single Locking Plastic - $ 19.90*
2 #10 White 60" Zippers - Single Locking Plastic - $ 17.40*
1 Sailrite "Make Your Own Cushions" DVD - $ 19.95
Shipping from Sailrite - $ 15.24
Minus 10% Discount ($ 31.66)
Total from Sailrite: $300.23

* Note: Single locking zipper is hard to sew around, at the ends. I recommend using non-locking zipper for this type of project. That way the slider and lock don't get into the way. (Wish I had known.)

Foam from Joann's: (Note all of the foam was purchased with 40% to 50% off discounts)
2-2"thick x65" long x 24.5" wide $ 67.22
1-3"thick x 74" long x 24.5" wide $ 52.78
2-4"thick x 62" long x 24.5" wide $114.57
1-4"thick x 69" long x 24.5" wide $ 58.44
Total from Joann's: $293.01

Other Materials/Instruments Used:
12 1/2"Brass Grommets
1 #18 Sewing Machine Needle for Ultrafeed Machine
Beulah (our Sailrite Ultrafeed LSZ-1 Machine)
Good Office Stapler
Box of Staples
Heavy Duty Stapler and Staples for Cushions with Plywood backs
Staple Puller
1/2" Die Set to install Grommets
Hammer
Flat Head Screwdriver
Scissors
Yard Stick
10' Measuring Tape
Seam Ripper

Time: ~65 hours

Total Cost of 6 extra large cushions $593.24. This cost does not include the cost of time or my Ultrafeed LSZ-1. However, with the completion of this project, Beulah (my Ultrafeed LSZ-1) has more than paid for herself, my sewing skills have improved, and Ariel feels and smells fresher.

Wednesday, July 14, 2010

Maintenance for LSZ-1 Ultrafeed Sewing Machine

Recently, I finished the first big project on my Sailrite LSZ-1 Ultrafeed sewing machine, named Beulah. The project was sewing six new cushions for our settee, on our Gemini 3200. (The smallest cushion was 62"x22"x4".) Beulah was really working hard and loving every minute of it.

Shortly after threading the machine with a new spool of thread, I began to hear a new noise coming from the machine. After I heard it for the fifth time, I stopped sewing. It sounded like metal hitting something. I pulled out my sewing machine manual to see if I could determine where the sound was coming from.

The manual stated that the machine needs to be "oiled frequently," but what constitutes frequently. My gut was telling me that I needed to oil Beulah (my machine). That's exactly what I did and she sounded beautiful again.

The thing I learned was that my machine"Beulah" needs to be cleaned and oiled every time 1 oz or 250 yards of thread is used. This is how frequent my LSZ-1 Ultrafeed needs to be cleaned and oiled.

Monday, July 12, 2010

Settee Cushions Redo - Part 2


Six large cushions later, the settee is fresh and new! I finished the last two seat cushions just before we left for the July 4th weekend in Savannah and assembled them, as soon as we arrived.

The assembly consisted of me shoving the foam into the cushion covers I made. (I did not assemble the cushions in Atlanta, because we had to travel with them and to make the best us of space, I had to fold the foam.) You can see from the photo that I needed to work the foam, so that the it fills in all of the turns. The bottom cushions looked smoother after working the foam, with only one or two rolls in the fabric. If these don't smooth out within the next month or so, I will add a little batting. This will make the cushions fuller, thus removing the rolls.

I finished off the settee with two outdoor pillows from Cost Plus World Market.

We wanted the boat for feel fresh and tropical. I think that we have accomplished those feelings in the main saloon.

Sunday, July 11, 2010

Sailrite's Customer Service

Sailrite's customer service is awesome! I have only had positive experiences every time I have interacted with someone from this company.

Within the last month, I began having an issue with the posi-pin on my LSZ-1 Ultrafeed sewing machine. The pin would disengage while I was sewing and spring out of the fly-wheel. Since the pin engages the needle, you can not sew without it. (This was a pain, because I was working on the settee cushion project and was in the "sewing grove".)

I sent a message to Sailrite, asking for assistance. Before Sailrite could write back (within 5 minutes), I found a work-a-round. I simply removed the spring from the posi-pin and re-inserted the pin into the fly-wheel. Problem solved. This work-a-round allowed me to finish my cushions and to re-connect with Sailrite at a later time.

This past week, I finally got around to re-connecting with Sailrite. My original message asking for assistance received a response within 1 1/2hours of sending it. I think this is very good, since I sent the message at 8:30 pm. The response stated that the detent ball, in the pin, had probably popped out and I needed a new posi-pin. The message also stated that "If your machine is newer, it is covered by warranty. Call 800-348-2769 to check on a warranty replacement." Well, my machine was new, but I had not gotten around to registering the warranty with Sailrite and I could not find my warranty card. I thought that could be an issue, since the warranty card was suppose to be sent in within 30 days of purchase.

No issue at all. I called the warranty department, emailed the information requested on the warranty card, and called back to place my order for a new posi-pin. All I had do was pay the first class mail postage for shipping of the pin. What a great company!

Over the years, my family has interacted with the warranty departments of several "big" companies, but we have never received better service than the service we received from Sailrite.

THANK YOU SAILRITE!!!!

Tuesday, June 29, 2010

Settee Cushions Redo - Part 1

Over the past couple of months, I have been making new settee cushions for our Gemini 3200. Given my limited sewing experience, I have been taking my time making the new cushions. I want to do a really good job, because this is our home.

Before starting this project, I did a lot of research on making cushions and the different materials to use. Sailrite's website has been an invaluable resource to me. This website not only has all of the material, sewing aids, and notions, but also terrific "how to" videos. When I purchased everything to make the cushions from Sailrite, I also purchased their "Make Your Own Cushion" dvd. This dvd is definitely worth its $19.95 price. I have completed 4 of the 6 settee cushions and have referenced the video each time.

All of the materials used to make the cushions were purchased from Sailrite, except the foam. Foam is very expensive and even more expensive to ship. After a lot of thought, we decided to purchase the foam at our local JoAnn's store. It did not hurt that I came across a couple of 5o% and 40% off coupons. For the material we chose Naugahyde Universal, which is a durable outdoor marine grade material. The reasoning behind picking it was that if it can hold up to the outdoor marine enviornment, then it should do fantastic inside.

The plan is to finish the cushions this week. After I finish the last cushion and place it in the boat, I will post before and after pictures of the settee renovation.

Thursday, April 29, 2010

Sunbrella Fabric

With all of the canvas sewing projects that we have on our list, a discussion arose to which outdoor/marine fabric we should use. After a little research the answer was easy, Sunbrella.

Sunbrella is a solution dyed acrylic fabric. Because it is solution dyed, the fabric is highly resistant to fading. It is also one of the best ultraviolet resistance fabrics available to consumers. Sunbrella will not noticeable shrink or stretch and it's breath-ability characteristic prevents condensation. The fabric is also water and mildew resistant. But best of all, both sides of this fabric are the same, meaning that either side can be exposed to the outside. It also means that this fabric does not have a wrong sides, which translates into less wasted fabric.

It is almost the perfect fabric for boats. We have chosen to use the Logo Red color on our boat.

Monday, April 19, 2010

Main Sail Repair

Now that our Gemini 3200 is in Savannah, it's time for me to revisit some of my sewing projects. I took advantage of Sailrite's 10% off sale and placed a couple of orders, over the last month. One of these orders included materials necessary to complete some minor repairs to our main sail.

The repairs to the main sail included replacement of a broken shackle and slide on the foot of the sail and a permanent repair to a small rip in the sail.


Replacement of the broken shackle and slide was as easy as replacing a light bulb. The only tool needed was a small flat head screwdriver. Remove the old shackle by unscrewing a small screw, place the new slide onto the new shackle, and secure the shackle to the sail via the grommet. One thing to note when replacing a shackle on the foot of the sail is to make sure it is the same size as all of the other shackles. If it isn't, then the slide won't be the same distance away from the edge of the sail as the other slides and could cause chaffing on the sail. Sailrite recommends that if you are not sure about size of the shackle needed, replace all of the shackles so that they are all the same size.


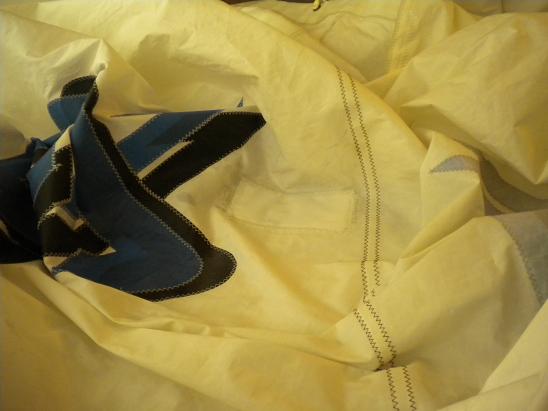
The permanent repair to the small rip in our main sail allowed me to work with one of the newest members of our crew, Beulah . For this repair, I needed two pieces of 3"x 7" 4oz. Dacron sailcloth, V-92 white thread, 3/8" seamstick basting tape, and Beulah. After cutting out the sailcloth patches, I placed double stick seamstick on one side of both pieces of sailcloth patches, placed the patches over the center of the rip on both sides of the sail, and stitched the patches down using Beulah. The sail repair was a relativity easy repair. The only difficulty I had was maneuvering the sail under Ultrafeed LSZ to get the stitches exactly where they were needed.


The main sail is now ready to be placed back on the boom.

Tuesday, March 30, 2010

Repairing Sun Sacrifice with Sailrite Ultrafeed LSZ-1

I've started my first boat sewing project, replacing the torn sun sacrifice on one of our jibs. As you can see from the photo, it has been ripped to shreds. Fortunately, the jib is unharmed.

I started this project by removing the torn sun sacrifice and noting what I need to replace it. I will be placing another order with Sailrite soon for webbing, grommets, red thread, and Logo Red Sunbrella fabric. I'm going to order enough to sew a sun sacrifice on our other jib and maybe make a new main sail cover, too. This project should boost my sewing skill and confidence.

Thursday, March 25, 2010

Choosing the Right Colors for Our Boat

Our boat is our home. We want her to feel like a home. We want Ariel to feel warm, tropical, fun, and inviting. So after reviewing all of the choices of marine and outdoor fabrics, we have decided to go with red, deep pink, orange, and white as our main color palette.

We are going to redo our sail covers in Logo Red. It is a true red. The settee cushions will be recovered in pure white naugahyde universal. I know what you are thinking, white with kids. I was thinking the same thing, but the white will liven up our teak heavy main cabin and this naugahyde is treated against bacteria and fungal micro-organisms, scuff and scrape resistant, UV and weather resistant, and is finished with Advanced BeautyGard. The addition of pillows with a colorful print will make it more inviting.

I can't wait to get started! We will post pictures!

Wednesday, March 24, 2010

First Order from Sailrite

I got my first order from Sailrite!

The order includes the "LoaditLED" package, 4 fabric samples (2 sunbrella and 2 naugahyde), needles for home sewing projects (10 #10), needles for really heavy/thick fabric (10 Serv 7 #21), needles for sail material (10 SD1 #22), 4 bobbins, 4oz cone V-92 white thread, and 50yds 3/8" basting tape. Sailrite also included March/April 2010 issue of Good Old Boat as a bonus!

The "LoaditLED" package included: needle assortment pack with deluxe seam ripper and maintenance brush (40 needles total - 10 #14, 10 #16, 10 #18, and 10 #20), 1" binder attachment (for sewing on binder tape and webbing), bendable LED sewing light, kickstand, and the Monster Balance wheel (for sewing without electricity).

I believe that I now have the basic notions and accessories to accomplish any sewing project. Going forward, I should only have to purchase material and thread.

I'm going to start my first project this week! I can't wait!

Sunday, March 21, 2010

Practice Sewing on Sailrite Ultrafeed LSZ-1

I started practicing sewing with Beulah, my Sailrite Ultrafeed LSZ-1.

Beulah came with 3 test samples that the factory used to test her functions with before sending her out. I used the sample to practice my sewing on sunbrella and naugahyde fabrics. I also repaired a pair of sweat pants, pants, and one of KJ's fleece one-piece pajama suits. My sister, Jen, also asked me to alter a snuggie that she bought for her dachshund, Lamont. The back of the snuggie was gaping open and the velcro kept coming undone. I simple stitched the center of the back together and sewed the velcro straps down.

I think it looks pretty good. Lamont like it, too!